
In this blog post we’ll do something different. We’ll use an old computer to set up a dedicated web server using Ubuntu Server edition, Apache and MySQL server.
What you’ll need
- A blank CD
- An old computer with CD drive
- Some free time (3 hours approximately)
DISCLAIMER: I have tried to provide you with accurate information, and everything I wrote worked for me, but please use your discretion before making any decisions based on the information in this blog. You know how computers can be 🙂 Also, take note that technology is changing. What I wrote today might not be valid in two weeks or two years. I will NOT compensate you in any way whatsoever if you ever happen to suffer a loss/inconvenience/damage because of/while making use of information in this blog.
Getting Ubuntu Server
You can download Ubuntu Server for free from ubuntu.com/download/server. Simply select your edition and click “Download” to download the ISO image.
Next, we’ll burn Ubuntu Server ISO image on a blank CD. For this, we can use CD burning software, but we don’t really have to. We can burn the image using only Windows 7 or Ubuntu Desktop edition.
Windows 7
Right-click on an .ISO file and select “Burn disc image“. Then select a drive you wish to use and click “Burn“.
Ubuntu Desktop
Right-click on an .ISO file and select “Write to disc…“. In the dialogue box select the “Burn” option.
Ubuntu Server installation
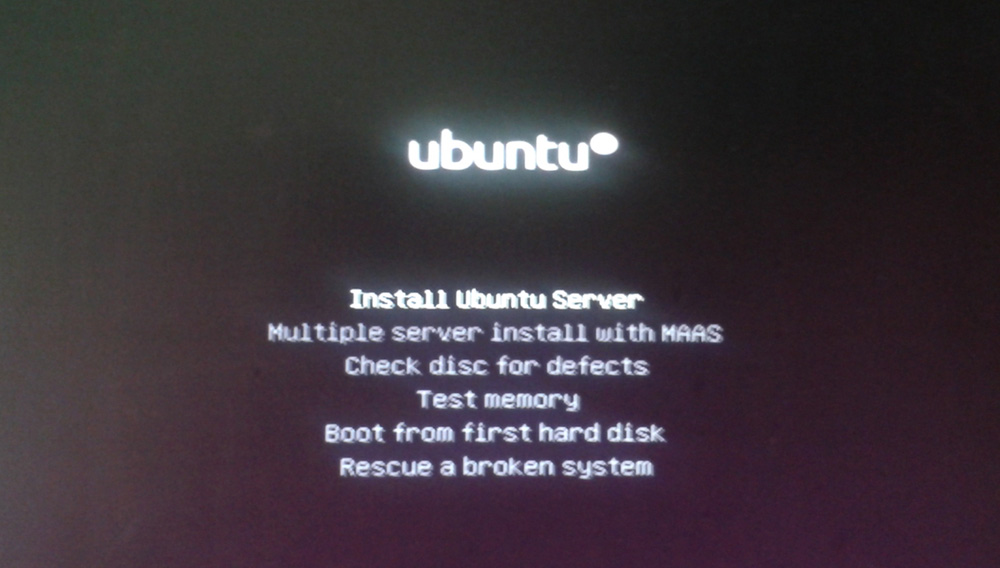
A screen with options to start the setup will load. You can also use these options to check memory or disc, but select the “Install Ubuntu Server” option and press Enter.
Once the image burning is complete, you’ll need to go to your computer’s BIOS and set up the DVD as a first boot device. Then save settings. Your computer will restart.
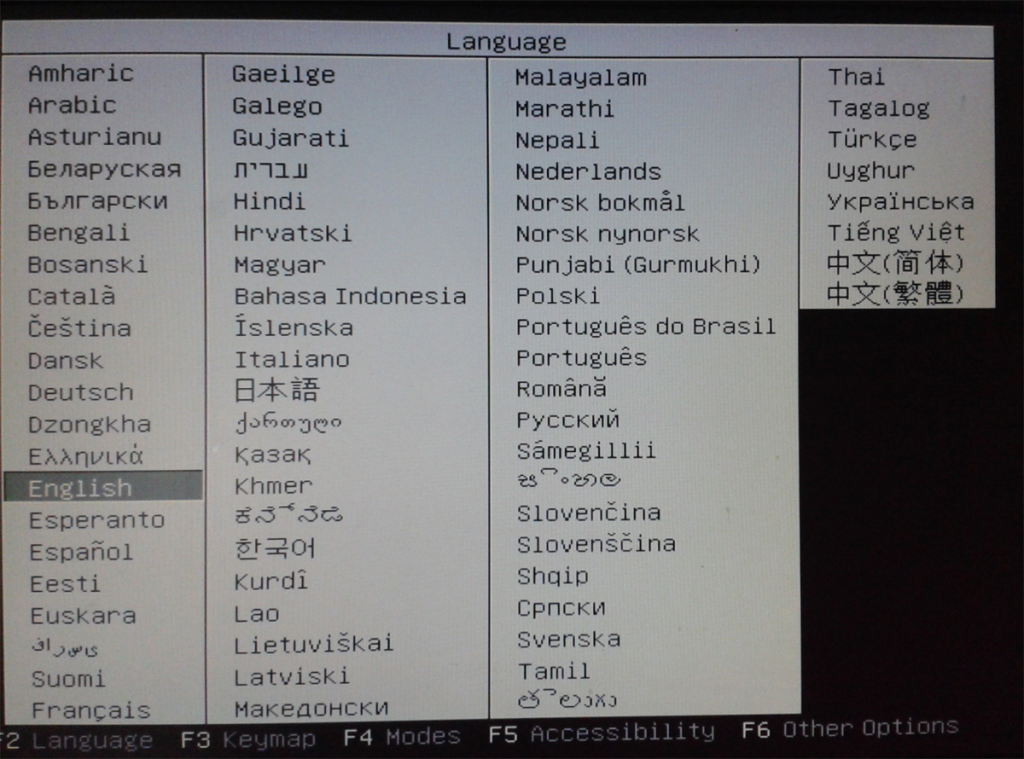
The computer will boot from DVD and setup will start. On the first screen, the setup asks for the language that will be used. Choose your preference and press Enter.
A screen with options to start the setup will load. You can also use these options to check memory or disc, but select the “Install Ubuntu Server” option and press Enter.
You’ll be asked to choose the language to be used for the installation process. The language you select will also be used as the default language for the system. Choose your preference.
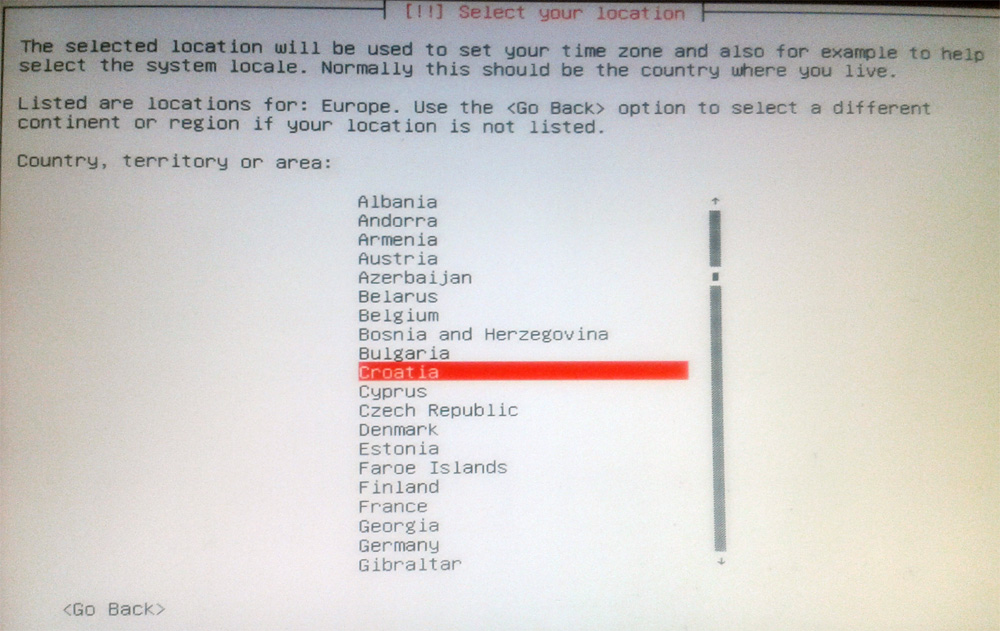
Next, you’ll be asked where you live. If you (like me) want your system to be in English and use some other location for setting up the time zone, select other.
The setup may tell you that it doesn’t have a locale for a combination of country and language you selected. In that case, it’ll ask you for a locale. Choose UTF-8. Setup will also offer to detect the keyboard layout. You can do this or select the keyboard layout from a list. The detection works great and it detected my keyboard layout correctly.
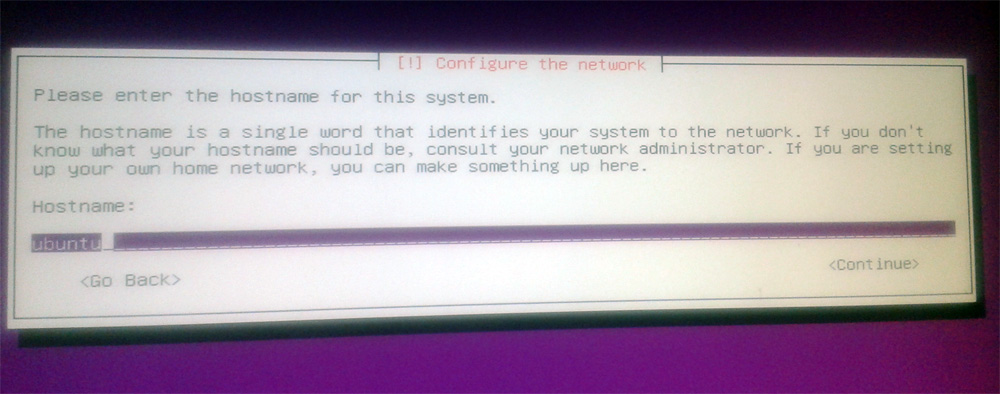
Next, the setup will do hardware detection. It will also do network configuration including Link-Local Address, and getting an IP address from DHCP. Next, the setup will ask for the hostname. As the on-screen introduction says, “if you are setting up your own home network, you can make something up here.” So, do just that.
Setup will create a new user account to be used instead of the root account. First, enter the user’s full name. Next, it will ask for the username. The username should start with a lowercase letter. After that, it will ask for a password. Surely, you know how to make a good password. 🙂
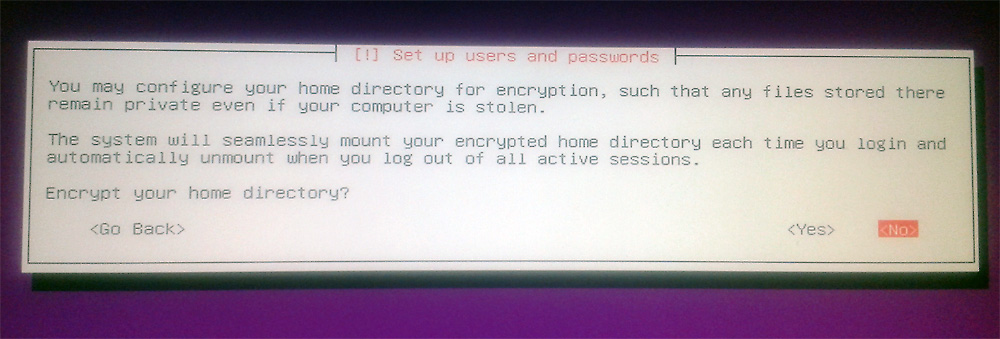
Next, the system will ask to encrypt your home directory, offering an explanation that the directory will be mounted when you log in. However, there are a few caveats when using an encrypted home directory. I would recommend not encrypting it. You simply don’t need it.
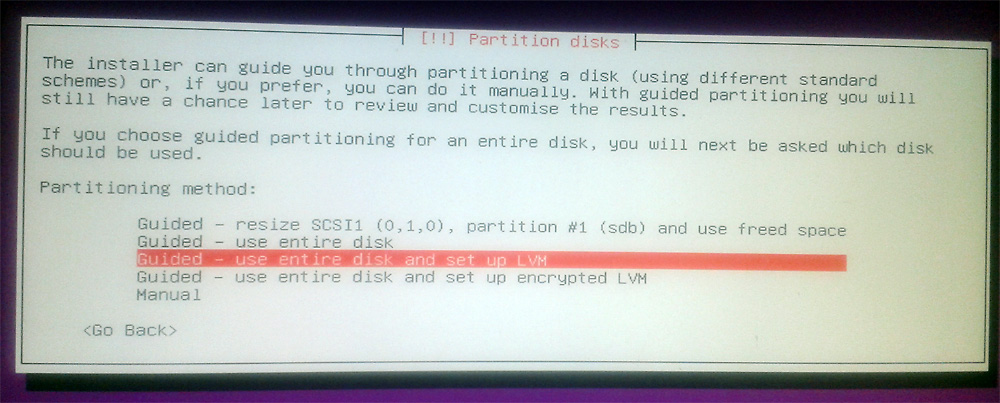
Then it will ask you is the time zone correct. After that, it’s partitioning time. The setup will offer you a few options, including whether to use Logical Volume Manager or not. I won’t go into details here, you can take a peek at askubuntu.com.
I have two hard disks in this old computer, so I chose to use LVM, but if you have only one disk you really don’t need it. The great thing about LVM is that you can create/resize/delete “partitions” from the command line while the system is running. If you don’t need that go without LVM.
If you have more than one drive, it asks you to choose the drive to partition. If you don’t it will state that the current partition scheme needs to be written to disk. Simply do that and continue configuring the LVM. Then the setup will ask how much of space on the drive to use for partitioning.
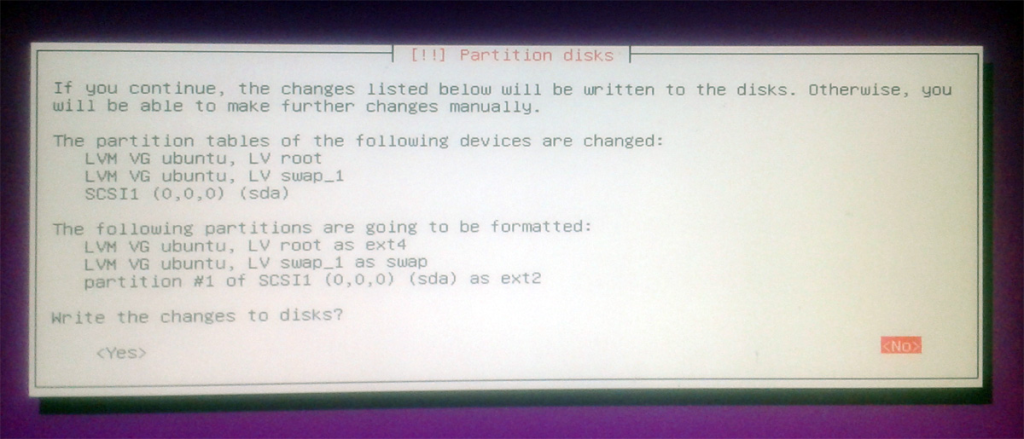
On the next screen confirm your selection to have the changes written to disk. Or you can go back and change your preferences. Once the changes are written the installation starts.
Once the files are copied the installation will ask for HTTP proxy. If you don’t have one or don’t know what it is, simply leave the field blank. 🙂 The installer will then continue with setup.
After that setup will ask about automatic updates. Good option to choose is to install security updates automatically.
The system will then finish installing and offer to instal additional software. You can use this dialogue to install LAMP stack and other servers, including Tomcat, PostgreSQL, Samba and others.
Select the software you wish to install and continue. If you didn’t select anything don’t worry, I’ll show you how to install it later. After this, the software will be installed and setup will complete. Lastly, the setup will ask to install GRUB boot loader to master boot record, so let’s do that.
Remove the CD from the drive and let the setup restart your computer. The computer will restart and the OS will load. As we said at the beginning of the article, Ubuntu server doesn’t have a Graphical User Interface, so after logging in, you’ll have console access for configuring your server.
Networking settings
The first thing you might wanna do is to set up your networking settings manually. That means setting Interface IP address, default gateway and DNS server manually.
Permanent Configuration
We need to open file /etc/network/interfaces in a text editor:
$ sudo nano /etc/network/interfaces
For your network interface there will be something along these lines:
auto eth0
iface eth0 inet dhcp
We need to change it:
auto eth0
iface eth0 inet static
address 192.168.1.50
netmask 255.255.255.0
gateway 192.168.1.1
Obviously, you need to change these settings to your network, but for most home networks these are the settings. Press Ctrl-X to exit and when prompted save the file.
Save the file and close. Now we have to restart networking:
$ sudo /etc/init.d/networking restart
To configure the DNS servers on Ubuntu Server you need to edit resolv.conf template’s tail file so that our /etc/resolv.conffile contains correct nameserver:
$ sudo nano /etc/resolvconf/resolv.conf.d/tail
Then enter IP address of your DNS server.
nameserver 192.168.1.1
Save the file and exit. Now we need to restart resolvconf to regenerate the resolv.conf file:
$ sudo service resolvconf restart
To verify the configuration try to do a simple DNS lookup:
domagoj@ubuntu:~$ host google.com
google.com has address 173.194.35.137
google.com has address 173.194.35.142
google.com has address 173.194.35.128
google.com has address 173.194.35.129
google.com has address 173.194.35.130
google.com has address 173.194.35.131
google.com has address 173.194.35.132
google.com has address 173.194.35.133
google.com has address 173.194.35.134
google.com has address 173.194.35.135
google.com has address 173.194.35.136
google.com mail is handled by 40 alt3.aspmx.l.google.com.
google.com mail is handled by 50 alt4.aspmx.l.google.com.
google.com mail is handled by 10 aspmx.l.google.com.
google.com mail is handled by 20 alt1.aspmx.l.google.com.
google.com mail is handled by 30 alt2.aspmx.l.google.com.
Temporary configuration
For the sake of completeness, there’s also a temporary configuration. Temporary configuration means that settings take effect immediately, but they will be lost after a reboot. If this is acceptable to you here’s how to do it:
You can configure the IP address using ifconfig command:
$ sudo ifconfig eth0 192.168.1.50 netmask 255.255.255.0
You can configure a default gateway like this:
$ sudo route add default gw 192.168.1.1 eth0
Installing SSH server for console access
Now, wouldn’t it be great if you could connect remotely to your server using a terminal? For this to happen you need to install SSH server.
$ sudo apt-get openssh-server
After installation your SSH server is ready to use. Now all you need is a SSH client to be able to connect to your server from your other computer. I recommend you to use PuTTY.
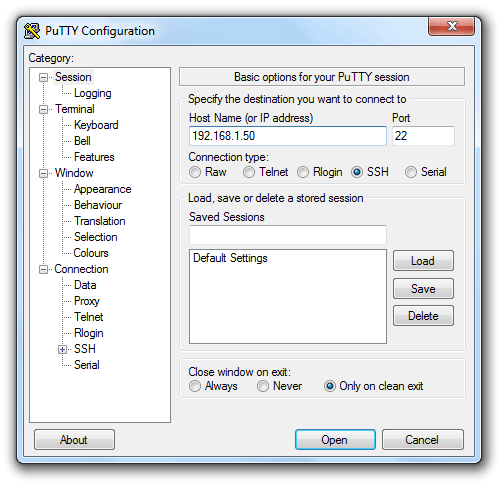
Once you download PuTTY, the only thing you need is to enter your server’s IP address and click Open. If a dialogue box appears you only need to click Yes to save the server’s host key. When you click Yes you’ll be connected to your server and ready to work.
NOTE: if you plan to remotely access from outside your local network, be sure to configure SSH server to be as safe as possible.
Installing LAMP
If you didn’t install LAMP during setup here’s how to do it. We’ll use Tasksel, which is installed on Ubuntu Server by default.
To run Tasksel simply type:
$ sudo tasksel
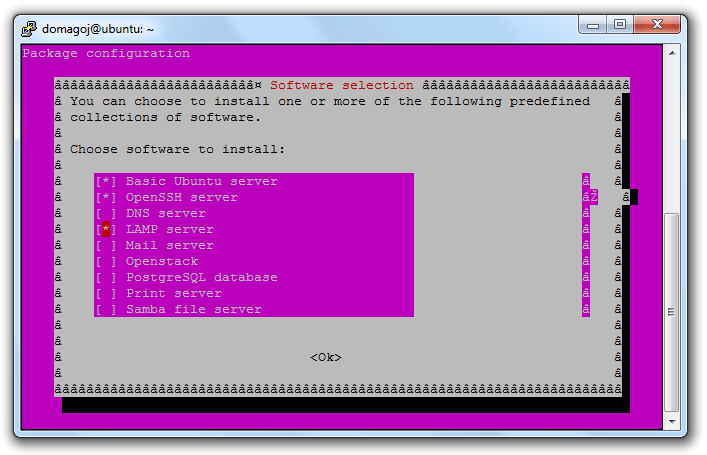
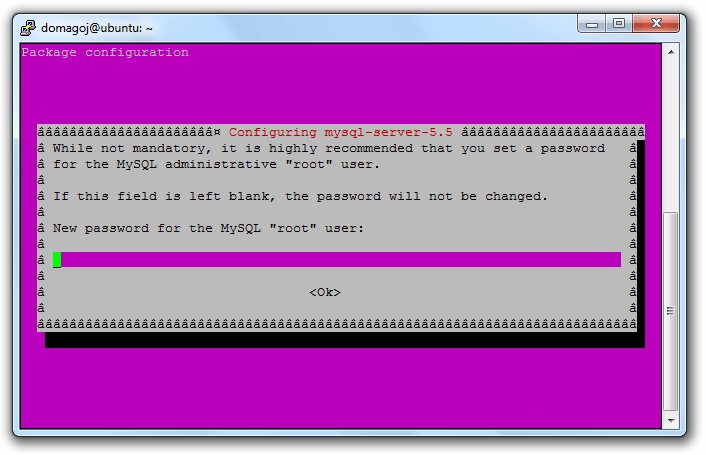
Simply select LAMP server using the spacebar and press enter. Tasksel will download and install the necessary packages. After that it will even help you to set up everything you need:
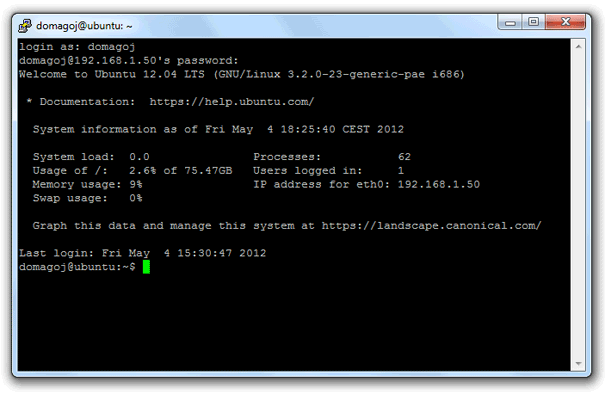
The setup will complete and you’ll be left with a fully functional LAMP server which works and can be accessed remotely by typing the Interface IP address we configured earlier:

NOTE: If you don’t feel like using Tasksel to install everything at once, you can do it yourself, step-by-step. There is a great guide for installing them one at a time.
Transferring files to the server
We’ll now transfer some files to the server, simply to show what to use and how to do it. We’ll create a virtual host in another blog post.
We need to put our files in the /var/www directory on the server. To do that we’ll use SFTP to transfer files because it’s installed together with our SSH server. Also, it’s more secure than FTP.
The first thing we need is to make the /var/www directory writable to you. The best way to do this is to create a new group (named web here), give the group ownership of the directory, read and write permissions and then add your account to the group. We also added the “group sticky” flag so that all newly created files have proper permissions as well.
$ sudo groupadd web
$ sudo chown -R :web /var/www
$ sudo chmod -R g+rwX /var/www
$ sudo chmod g+s /var/www
$
$ sudo adduser domagoj web
The second thing we need is an SFTP client. There are a lot of those out there for all platforms.
- FileZilla – FREE (Windows, Linux, Mac OS X)
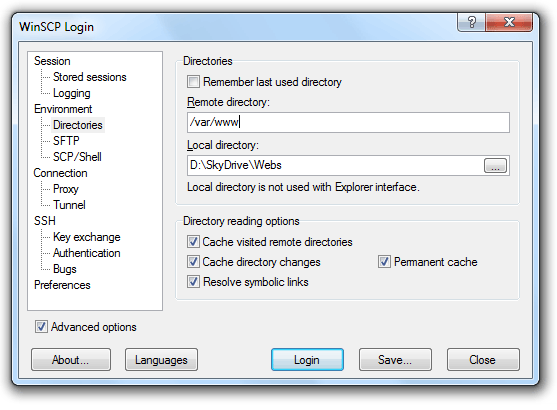
- WinSCP – FREE (Windows) – My personal favourite
- SmartFTP – 54$ (Windows)
Then we can use our SFTP client to connect to our server. When making a connection enter an IP address of the server, username and password. You can even set a remote directory to /var/www.
When connecting you will be asked if you trust the server. Simply say yes to store the server’s key to the cache. Then in the future, you won’t be presented with such a prompt.
Now you can make a test.php file locally and transfer that to the server:
Then simply use the browser to view the file:
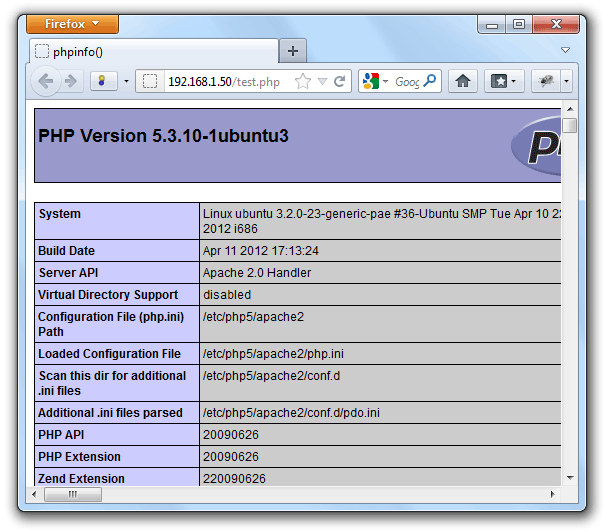
That’s it. We have a dedicated server capable of executing PHP files and we can transfer our files to the server. We don’t know yet how to create virtual hosts, but we’ll get to that in another blog post.
Security
So, our server is ready to be used for inside-the-network experimentation, but it’s not quite ready to be used with port forwarding & Dynamic DNS. This blog post won’t get into that, but let’s quickly go over some quick security configurations.
Automatic Updates
If you didn’t select this option during setup, unattended-upgrades package can be used to automatically install updated packages and can be configured to update all packages or just install security updates. For more information consult the documentation.
Apache Configuration
There are some things in the Apache configuration that can be tweaked to make it more secure. Be sure to visit the following links for great recommendations about security:
Conclusion
We have successfully installed and configured Ubuntu Server, SSH, Apache, MySQL and PHP. In the next blog post we’ll create a MySQL database on the server and a PHP file that reads from it. Then we’ll create a virtual host for our little project.
If you have some hints and additional security considerations on using Ubuntu Server, don’t hesitate to leave a comment. Also, feel free to suggest additional blog posts for this topic. Thank you for stopping by.